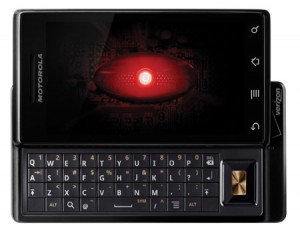
*Both Rooting and setting up the backup are potentially hazardous to your Droid. You are responsible for everything that happens to your phone while following this tutorial, NOT ME. If you have problems while doing this, I may be able to help you if you email me at [email protected] or PM me on Freenode IRC network (nick: Flakeparadigm). ONLY continue if you are confident in what you are doing. -Continue at your own risk-*
(EDIT 01/08/2010: I will keep this tutorial updated with the latest version if SPRecovery. Rooting for different versions of Android will be in a separate post.)
(Edit 04/05/2010: No longer wil I update the version on this server. Use DroidMod Updater from droidmod.com)
After having a bit of a hard time doing this myself, I figured I’d write up a post on how I ended up doing this so that it would be easier for everyone else.
Rooting the Droid
To get root on the Verizon Droid, first download droid-root.zip and copy it to your SD card as update.zip and follow the steps below.
- Reboot your phone.
- Press x on the hardware keyboard while booting until you see the white Motorola logo, then release.
- Press Volume Up + Camera when you see a picture of an exclamation point and a phone.
- Navigate through the menu using the arrows on the hardware keyboard (portrait mode) to Apply sdcard update.
- Apply the update and reboot.
- You now have root.
This is not a traditional Android “rooting”, root access is presently only available through the adb shell. Install the Android Debug Bridge to your PC and enable USB debugging in your phone by going to Settings -> Applications -> Development and selecting USB debugging. In your systems shell (or command prompt for windows) type adb shell (assuming your paths are correct setup) and you will be connected to your Verizon Droid. Type su and you are root. Be very careful with this as you can do damage to your phone when in a root shell.
It should now only be a matter of time before a custom firmware is available for the Motorola Sholes. Do not flash any other firmware updates as this may patch the vulnerability used by droid-root.zip.
From Michael’s “Dereferencing zero” blog.
Backing up your ROM
*This tutorial requires the Android SDK which can be downloaded from here: http://developer.android.com/sdk/index.html*
Download these three files and place them in the tools folder of the SDK:
- http://tan-com.com/blog/wp-content/uploads/2009/12/flash_image
- http://tan-com.com/blog/wp-content/uploads/2009/12/ramdisk_extras.tar
- http://tan-com.com/blog/wp-content/uploads/2009/12/recovery-0.99.2b.img
Open up a terminal/command prompt and navigate to the tools folder of the SDK (Example, in Linux “cd ~/android-sdk-linux_86/tools” if you extracted the SDK to your home directory). Now move the downloaded files to the phone using these commands:
[bash]./adb push recovery-0.99.2b.img /sdcard/
./adb push ramdisk_extras.tar /sdcard/
./adb push flash_image /sdcard/[/bash]
Then, move the flash_image binary from the sdcard into /data/local:
[bash]./adb shell
su
mount -o remount,rw -t yaffs2 /dev/block/mtdblock4 /system
mkdir /system/xbin
dd if=/sdcard/flash_image of=/system/xbin/flash_image
chmod 755 /system/xbin/flash_image
rm /sdcard/flash_image[/bash]
Now it’s time to flash the image to the recovery partition:
[bash]/system/xbin/flash_image recovery /sdcard/recovery-0.99.2b.img[/bash]
Now, if you want to keep this recovery image installed, you must follow a few extra steps, as Android normally generates and reflashes the recovery image based on the boot image every time you turn on the phone. To change this, run:
[bash]mount -o remount,rw /dev/null /system
mv /system/recovery-from-boot.p /system/recovery-from-boot.p.bak
mv /system/etc/install-recovery.sh /system/etc/install-recovery.sh.bak[/bash]
Now, you can reboot your phone into recovery mode. You have two options: either turn off the phone normally, then hold the ‘x’ button while turning it back on, releasing it only after the Motorola logo appears, or using ADB to reboot the phone (make sure you have exited out of the shell first. Running the “exit” command twice will work):
[bash]./adb reboot recovery[/bash]
If the image was not flashed correctly, you will see an icon that looks like “/!” (you will have to fix this problem by your own means). However, if the image was flashed correctly, you will see a golden Android logo with a few options in blue near the top of the screen.
To backup, use the D-pad to navigate the selection down to “backup/restore” and press the center button to select it. Then navigate to and select “Simple Nandroid backup” and let Nandroid do the work.
To restore, use the D-pad to navigate the selection down to “backup/restore” and press the center button to select it. Then navigate to and select “Simple Nandroid restore” and let Nandroid do the work.
Once everything is done, use the Power button as a back button to get to the main menu and reboot the device using the menu option. The device will then boot up normally.
The recovery tutorial was created with the help of my friend Scott.

One thought on “How to Root and Backup on your Droid”